
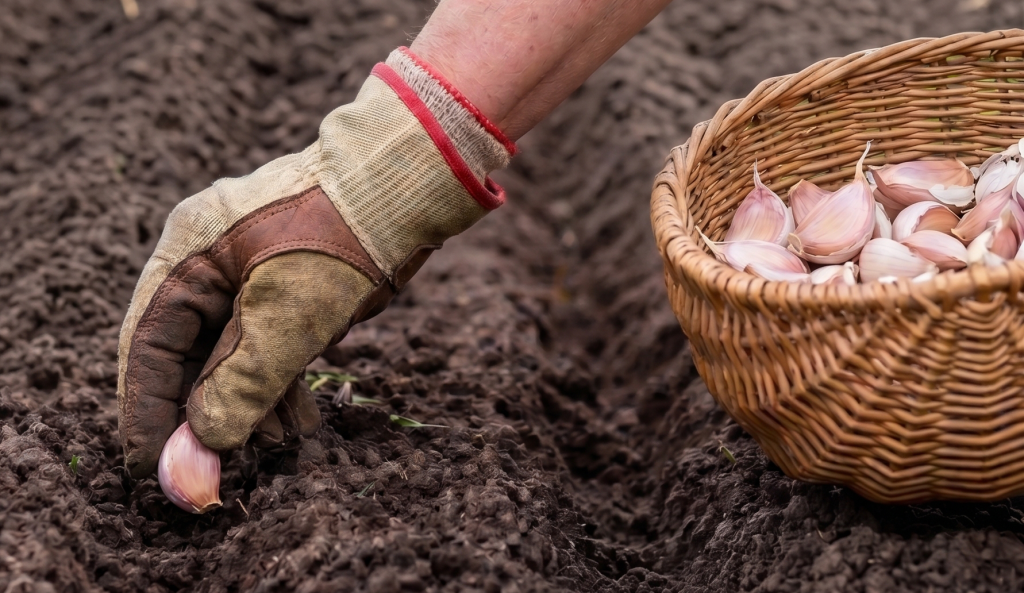
Plant Garlic This Fall and Harvest It Next July
Most of the garden is winding down right now. The tomatoes are getting leggy, the squash has powdery mildew, and you’re probably spending more time pulling spent plants than putting new ones in. This is exactly when you should be planting garlic.
Garlic runs on the opposite schedule from most of the garden. You plant it in fall, it grows roots before winter, sits quietly through the cold months, and then comes back to life early in spring. By July, you’re digging up full heads. Here’s how to do it right.
When do you actually plant garlic in the fall?
I wouldn’t get too hung up on one exact planting date. What matters more is giving the cloves time to grow roots before winter really sets in. A common target is roughly 4 to 6 weeks before the ground freezes hard, though your timing will depend quite a bit on where you live. The Old Farmer’s Almanac gives a useful backstop: wait until after the fall equinox in late September rather than planting while the soil is still warm.
In colder northern zones, roughly 3 to 5, that often means late September through October. In zones 6 and 7, mid-October into November is common. Gardeners in zone 8 and warmer may not plant until November or even December.
If you’re not sure when your area usually gets its first hard freeze, look it up by ZIP code before you plant. Local weather matters a lot more here than a date printed on a seed packet.
Seed garlic vs. grocery-store garlic
You technically can plant garlic from the supermarket, but I wouldn’t make it my first choice. Some grocery-store garlic has been treated to slow sprouting so it sits on a shelf longer, and more importantly, you usually don’t know what variety you’re getting or whether it suits your climate. Seed garlic is simply garlic grown and sold specifically for planting, normally labeled by variety, which makes it much easier to choose the right type for where you live.
There are two main groups. Hardneck garlic handles cold winters well and usually produces larger, strongly flavored cloves arranged around a stiff central stalk. It also sends up a curly flower stalk called a scape in early summer, which you can cut and eat.
Softneck garlic produces more cloves per bulb, stores longer, and does especially well in milder climates. It’s also the type used for garlic braids.
If you live somewhere with cold winters, hardneck is usually the easier choice. If your winters are mild, softneck may be better suited to your garden.
If you don’t have a local source for seed garlic, SeedsNow is one place to check. They carry both hardneck and softneck varieties, so just make sure you’re choosing one suited to your winters. Order sooner rather than later, since popular varieties can sell out early.
Why did my garlic grow as one round with no cloves?
If your garlic has ever come out of the ground looking like one big round onion instead of a head full of cloves, lack of cold exposure may be the reason. Most garlic varieties need some cold exposure to form a well-developed head of separate cloves, a process called vernalization. Hardneck varieties generally need more chilling than softneck types.
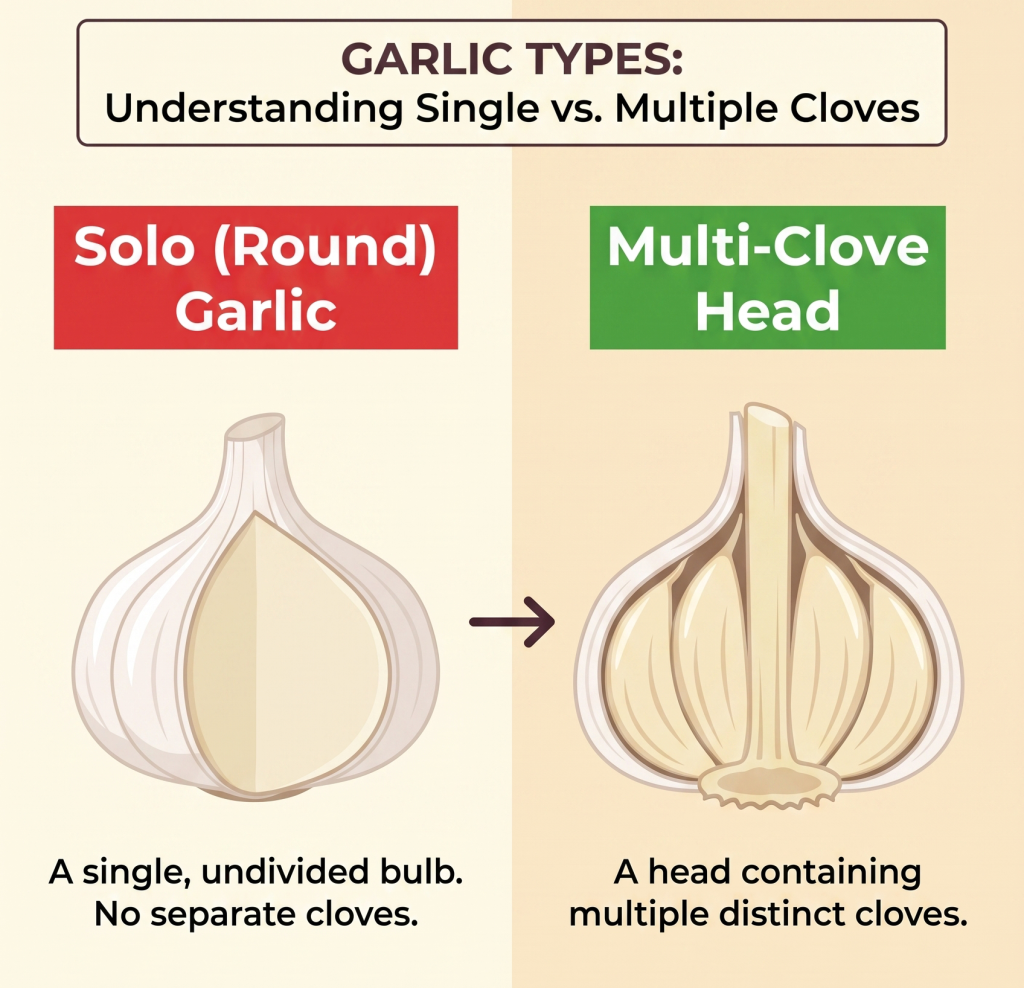
Without enough cold for the variety you’re growing, the plant may grow perfectly healthy leaves but end up forming one solid, undivided bulb called a round instead of dividing into a head full of cloves. This is more likely to happen in warm climates where winter temperatures don’t stay cold for long.
If you live in zone 8 or warmer and you’re growing a variety that needs more chill than your winter provides, you can give the garlic that cold period yourself before planting. Put your seed garlic in the refrigerator for around 6 to 8 weeks at roughly 35 to 40°F, keeping it dry and away from apples and other ripening fruit while it chills.
Then plant according to your normal fall or early-winter schedule. If you live somewhere with consistently cold winters, you usually don’t need to worry about this step. The garlic gets its cold treatment naturally in the ground.
How deep and how far apart do you plant the cloves?
Start with the bed. Garlic does best in loose, well-drained soil with plenty of organic matter, so if your soil needs help, work in a couple inches of compost before planting. The biggest thing to avoid is soggy soil, since garlic sitting wet all winter is much more likely to rot.
Wait until you’re close to planting before breaking the heads apart. Separate the bulb into individual cloves and leave the papery skin on each one.
Use the biggest cloves for planting, since your largest healthy cloves have the best chance of producing large bulbs. The tiny inner cloves are better saved for cooking.
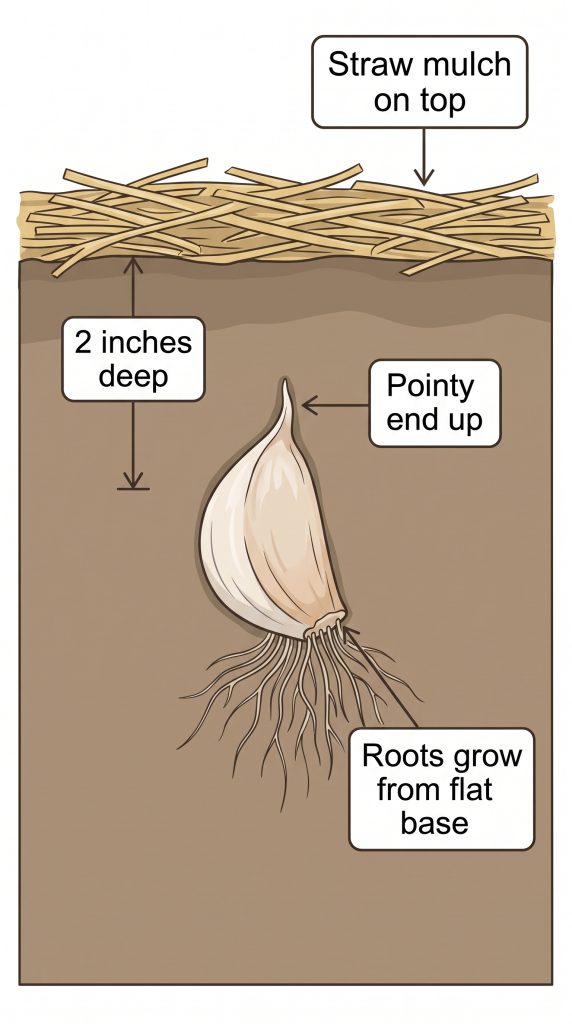
Plant each clove with the pointed end facing up and the flatter root end facing down, about 2 inches deep for most gardens. Space the cloves around 6 inches apart, a little closer for softneck if you’re short on space, with rows about 12 to 18 inches apart.
Once everything is planted, add mulch. In cold climates I like a fairly generous layer of seedless straw or shredded leaves, around 5 to 8 inches to start, which settles down over winter. Mulch protects the cloves from repeated freezing and thawing, keeps them from being pushed toward the soil surface, and makes spring weed control much easier. If your winters are mild, you don’t need quite as much.
What goes wrong, and how do you avoid it?
Garlic is pretty forgiving, but a handful of mistakes are worth avoiding. Planting too early is the common one. Put garlic into warm soil too soon and it may send up a lot of green growth before winter. A little green showing isn’t necessarily a disaster, but you don’t want a foot of top growth going into freezing weather.
In cold climates, don’t skimp on mulch either, since repeated freeze-and-thaw cycles can push cloves upward and expose them to cold and drying. Water matters more once spring arrives. Garlic likes steady moisture while it’s actively growing and forming bulbs, and around an inch of water per week is a reasonable target if you’re not getting enough rain.
Toward the end of the season, though, back off. Once the lower leaves start turning brown and harvest is getting close, stop watering roughly three to four weeks before you plan to dig. Constantly wet soil at that stage can stain the wrappers and encourage rot.
If you’re growing hardneck garlic, don’t forget the scapes. You’ll usually see them in early summer as curly green stalks coming out of the center of the plant. Cut them off once they’ve curled so the plant keeps putting energy into the bulb, then eat them. They’re great chopped into eggs, stir-fries, pasta, or blended into pesto.
The July payoff
Fall-planted garlic is usually ready sometime in July, though colder areas may run a little later. Don’t harvest based on the calendar alone. Watch the leaves.
As garlic gets close to maturity, the bottom leaves begin turning brown while the upper leaves stay green. Once roughly the lower third to half have browned, I’d start checking the bulbs. Use a garden fork or shovel to loosen the soil beside the plant and lift gently rather than yanking the stalk.
After harvest, the garlic needs to cure before storage. Hang the plants in small bunches or spread them somewhere shady, dry, and well ventilated for about three to four weeks. Don’t wash the bulbs beforehand, just brush away loose soil once it dries.
When the stalks, roots, and outer wrappers are completely dry, trim the roots and cut the stalk an inch or two above the bulb. Properly cured hardneck garlic generally stores for several months, and softneck usually lasts longer, often well into winter under good conditions.
Before you eat all of it, set aside a few of your biggest, healthiest heads for next year’s seed garlic. Over time, saving garlic that performs well in your own garden gives you planting stock increasingly suited to your conditions.
Ready to put some in the ground?
If you’ve never grown garlic before, it’s one of my favorite crops to recommend starting with. It doesn’t take much space, it doesn’t need constant attention, and most of the work happens during a cool fall afternoon when the rest of the garden is already slowing down.
Find a good variety for your climate, check your local frost timing, and get the cloves planted before the ground freezes. If you live somewhere with mild winters, start thinking about that refrigerator chill ahead of planting time.
Grow Real Food is reader-supported. Some of the links in this post are affiliate links, which means I may earn a small commission — at no extra cost to you — when you buy through them. This includes the Amazon Associates program (as an Amazon Associate, I earn from qualifying purchases) as well as other affiliate partners whose tools, seeds, and products I recommend. Prices are never raised to cover these commissions, and a commission never decides what makes the list — everything here is included because I actually use it or trust it.